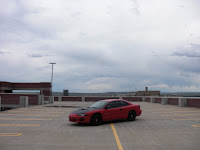
Wednesday, December 1, 2010
Tuesday, July 7, 2009
Monday, July 6, 2009
The Best It's Looked In 4 Years!
Thursday, May 28, 2009
Squeek-Be-Gone
Tuesday, May 26, 2009
The Venge Gets A Face Lift
 The bumper itself is not available aftermarket through PartsChannel or Keystone. Also it's not available reconditioned through Salt Lake Chrome or Collins Collision Products. No yards in the state had one and all the yards that did have one wanted around $200 just to ship the thing!! Add the $200 they wanted for the bumper itself and that's way more then I wanted to spend!
 After two months of searching I finally found a guy on ASEC that had one to sell. I paid $200 total for the bumper + shipping!! He managed to fold it into thirds and stuff it in a small enough box to ship FedEx!! When i got the package i took it out and set it outside in the sun for an hour so it could regain it's original shape. The only damage was some cracked paint and the pre-existing crack in the bottom that you can see in the picture to the left.
The following are pics of the repair on the bumper. I grinded down all the paint and used 3M panel bonding adhesive to do the repair.
After squeezing the adhesive through
Dry time: 24 hours

Primered, sealed, based, and cleared!! Now they're ready for install!
Thursday, May 7, 2009
Sunday Wash, BBQ, And Cruise Pics
Tuesday, May 5, 2009
Compression Test Results = Bad News Bears
So a friend and I did a compression test on my motor this weekend and I almost wish we hadn't. #3 was about 25-30psi lower than the other three. Dropped some oil in and the pressure went back up to normal thus concluding my piston rings are bad.
No boosted Venge this year :(
Since this is my only car I figure the best/easiest way for me to get her ready for boost is to buy a used motor and rebuild it over the next year or so. If I'm gonna be opening it up that much to replace the rings then I might as well build the sucker right. JE pistons, Eagle rods, sleeved block, 8.8:1 compression, etc.
I'm really bummed and slightly pissed about this whole situation but I know it'll be better this way in the long run.
I was so looking forward to the Lewistown test track, Beartooth Run, SCCA, & the drag strip this year and it really breaks my heart
Thursday, April 30, 2009
To Do List
1: Replace left tie rod end
2: Fix whatever is causing my steering wheel to shake once I hit 50 and other misc front end vibrations.
3: Find and fix my damn oil leak!!!!!
4: Replace the a/c compressor because I'm 99% sure that's where my belt noises are coming from and why not just replace the whole thing when I found one on ebay for $40? My a/c hasn't worked in years anyway and i've had people tell me it's the clutch in my current compressor. That's gettin your cake and eating it too! :)
5: Buy all new gaskets (ie, turbo, wastegate, bov, manifolds, exhaust)
6: Replace all blue couplers with red ones
7: Sand down and repaint IC tubing silver
8: Before the car can go down in the garage.... I must have a new bike motor so I can have transportation.
Once the turbo is on, I have to have exhuast pieces made. The cat-end of the downpipe I got is for a 3" exhaust with a 3 bolt flange. I need to get an exhaust shop to modify it to bolt up with my stock 2 bolt cat. During the install I will most likely be getting a full cat-back with a test pipe to make it a full turbo-back exhaust.


